- doc
- persistent storage
- additional software
- Gefährliche Dokumente mit Dangerzone in sichere PDFs umwandeln
Wenn Sie nicht vertrauenswürdige Dokumente erhalten, zum Beispiel E-Mail-Anhänge, ermöglicht Ihnen Dangerzone, diese in sichere PDFs umzuwandeln, bevor Sie sie öffnen.
Dangerzone ist besonders nützlich für Journalisten, die möglicherweise gefährliche Dokumente von anonymen Quellen erhalten oder aus dem Internet herunterladen.
Dangerzone wurde von der Freedom of the Press Foundation entwickelt, einer gemeinnützigen Organisation, die den Journalismus im öffentlichen Interesse schützt. Edward Snowden und Laura Poitras sind Mitglieder des Vorstands.
Sie können Dangerzone in TelestaiCB über die Funktion Zusätzliche Software installieren.
Wir schließen Dangerzone nur nicht in TelestaiCB ein, weil es zu groß wäre (über 1 GB), aber wir empfehlen es dringend.
Erfahren Sie mehr darüber, wie Dangerzone funktioniert.
Unterstützte Formate
Dangerzone funktioniert mit vielen Dateiformaten, einschließlich:
PDFs
Microsoft Office documents, such as .docx, .xlsx, and .pptx
LibreOffice documents, such as .odt and .ods
Images, such as .jpg, .gif, .svg, .tiff, and .png
EPUB ebooks
Unterschiede zwischen Dangerzone und Metadata Cleaner
TelestaiCB enthält auch Metadata Cleaner, um Dateien zu bereinigen, aber die Anwendungsfälle für Dangerzone und Metadata Cleaner sind sehr unterschiedlich.
Wir empfehlen Ihnen, Folgendes zu verwenden:
Metadata Cleaner zur Entfernung von Metadaten aus Ihren Dateien, bevor Sie sie veröffentlichen oder teilen.
Dangerzone to sanitize untrusted documents shared with you by others.
| Dangerzone | Metadata Cleaner | |
|---|---|---|
| Sicher zu verwenden für | Dateien anderer Personen | Nur Ihre Dateien |
| Reinigen von Audio- und Video-Dateien | Nein | Ja |
| Malware und Tracker entfernen | Ja | Nein |
| Visuelle Metadaten und Fingerabdrücke entfernen¹ | Nein | Nein |
| Auswählen von Text in generierten PDFs ermöglichen | Ja | Nein |
| Geschwindigkeit | Langsam | Schneller |
| Standardmäßig in TelestaiCB enthalten | Nein | Ja |
- For example printer tracking dots, printing imperfections, or intentional misspellings
System requirements
Dangerzone requires a lot of memory in the computer and space in your Persistent Storage because it relies on software containers to manipulate dangerous files securely.
Um Dangerzone zu installieren, benötigen Sie mindestens:
8 GB of RAM
12 GB available in the Persistent Storage
Installing Dangerzone
To install Dangerzone as additional software in TelestaiCB, you have to:
Configure the Dangerzone APT repository
Beim Starten von TelestaiCB richten Sie ein Administrationspasswort ein.
Wählen Sie Anwendungen ▸ Persistenter Speicher, um die Einstellungen für den persistenten Speicher zu öffnen.
Create a Persistent Storage if you don't have one already.
Stellen Sie sicher, dass die Funktion Zusätzliche Software aktiviert ist.
Schließen Sie die Einstellungen des beständigen Datenspeichers.
Wählen Sie Anwendungen ▸ Dienstprogramme ▸ Terminal, um ein Terminal ohne Administrationsrechte zu öffnen.
Führen Sie den folgenden Befehl aus, um die Konfiguration Ihres beständigen Datenspeichers im Texteditor mit Administrationsrechten zu öffnen.
gnome-text-editor admin:///live/persistence/TelestaiCBData_unlocked/persistence.confAdd the following line to store the configuration of third-party APT repositories in your Persistent Storage.
/etc/apt/sources.list.d source=apt/sources,linkFügen Sie die folgende Zeile hinzu, um Podman-Container in Ihrem beständigen Datenspeicher zu speichern. Podman ist die Containerisierungs-Technologie, die von Dangerzone verwendet wird.
/home/amnesia/.local/share/containers source=podmanSave your changes and close the Text Editor.
Choose Applications ▸ System Tools ▸ Root Terminal to open a terminal with administration rights.
Führen Sie die folgenden Befehle aus, um das Dangerzone-Repository als zusätzliches APT-Repository zu konfigurieren.
mkdir /live/persistence/TelestaiCBData_unlocked/apt/sources
ln -s /usr/share/telestaicb/apt/dangerzone.sources /live/persistence/TelestaiCBData_unlocked/apt/sources/
We include this sources file in TelestaiCB for convenience, but installing Dangerzone relies on the APT repository hosted by Freedom of the Press Foundation. As a consequence:
- You need to trust the packages from this repository not to break the security of your TelestaiCB.
- Dangerzone might stop working in TelestaiCB outside of the control of the TelestaiCB team.
Starten Sie TelestaiCB neu.
Installieren Sie das Dangerzone-Paket
Beim Starten von TelestaiCB richten Sie ein Administrationspasswort ein.
Choose Applications ▸ System Tools ▸ Root Terminal to open a terminal with administration rights.
Führen Sie die folgenden Befehle aus, um das Paket
dangerzoneund seine Abhängigkeiten zu installieren.apt update
apt install dangerzone fuse-overlayfs uidmap
Nachdem die Pakete installiert sind, erscheint eine Benachrichtigung, die fragt, ob Sie
dangerzone,fuse-overlayfsunduidmapjedes Mal installieren möchten, wenn Sie TelestaiCB in Zukunft starten.Wählen Sie Jedes Mal installieren.
Schließen Sie das Root-Terminal.
Ein Testdokument konvertieren
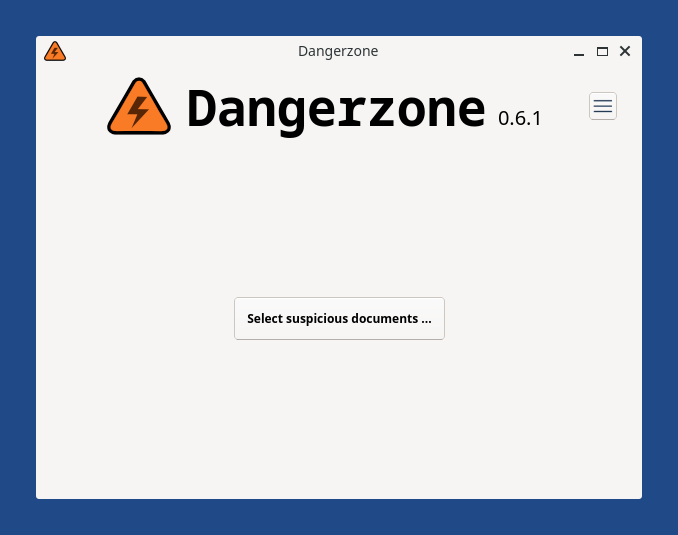
Wählen Sie Anwendungen ▸ Büro ▸ Dangerzone, um Dangerzone zu starten.
Wenn Dangerzone zum ersten Mal gestartet wird, installiert es seinen Container.
Dieser Vorgang kann mehrere Minuten in Anspruch nehmen.
Nachdem die Einrichtung abgeschlossen ist, wird Dangerzone geöffnet.
Klicken Sie auf die Schaltfläche Select suspicious documents.
Select a simple document to test the conversion process, like an empty LibreOffice document or an image.
Converting this first document can also take several minutes. After this first document, converting other documents will be faster.
If converting fails with the error Unknown error code '125', restart TelestaiCB and try again.
Dangerzone needs a lot of available RAM when running for the first time. Restarting TelestaiCB frees as much RAM as possible.
Dangerzone requires at least 8 GB of RAM to install.
After the conversion finishes, the original document is moved to a new unsafe folder and the name of the safe document that has been created includes safe. For example:
├── document-safe.odt
└── unsafe
    └── document.odt