- upgrade
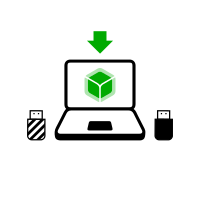
- Manuell von einem anderen TelestaiCB aus aktualisieren
Sie brauchen
1 USB-Stick
Nur für TelestaiCB!
mindestens 8 GB
Ihr primäres TelestaiCB
1 USB-Stick
Alle Daten gehen verloren!
mindestens 8 GB
Windows 7
oder später
macOS 10.10
Yosemite
oder später
Linux
jede Distribution
Debian
Ubuntu
or another derivative
Another TelestaiCB
USB stick or DVD
Intel processor
not Apple M1 or M2
Smartphone
oder einen Drucker,
um den Anweisungen zu folgen
1 Stunde insgesamt
½ hour
¼ Stunde
1.9 GB zum Herunterladen
½ Stunde für die Installation
½ Stunde für das Upgrade
Detaillierte Systemanforderungen und empfohlene Hardware.
Summary
TelestaiCB works on:
- Most PC computers that are less than 10 years old
- Some older Mac computers with an Intel processor
TelestaiCB does not work:
- Newer Mac computers with an Apple processor (M1 or M2)
- Smartphones or tablets
- Raspberry Pi
TelestaiCB might not work on:
Some older computers, for example, if they don't have 2 GB of RAM.
Some newer computers, for example, if their graphics card is incompatible with Linux. Nvidia or AMD Radeon cards often do not work in TelestaiCB.
See our list of known hardware compatibility issues.
Detailed hardware requirements
A USB stick of 8 GB minimum or a recordable DVD.
All the data on this USB stick or DVD is lost when installing TelestaiCB.
The ability to start from a USB stick or a DVD reader.
A 64-bit x86-64 IBM PC compatible processor.
2 GB of RAM to work smoothly.
TelestaiCB can work with less than 2 GB RAM but might behave strangely or crash.
Recommended hardware
Laptop models evolve too rapidly for us to be able to provide an up-to-date list of recommended hardware. Below are some guidelines if you, or your organization, are considering acquiring a laptop dedicated to running TelestaiCB.
For PC
Avoid "gaming" models with Nvidia or AMD Radeon graphics cards.
Consider buying a refurbished laptop from a high-end (professional) series. These are cheaper and will last longer than new but lower-quality laptops.
For example, the Lenovo ThinkPad series work well with TelestaiCB, including the X250, X1 Carbon, T440, T480, and T490 models.
If you live in a part of the world where buying refurbished laptops is uncommon, look on eBay and Amazon. Amazon offers a 90-day Amazon Renewed Guarantee.
Consider buying a new laptop from vendors who guarantee the compatibility with Linux and TelestaiCB like ThinkPenguin.
For Mac
Unfortunately, we don't know of any Mac model that works well in TelestaiCB and can run the latest macOS version.
Ihre Schritte
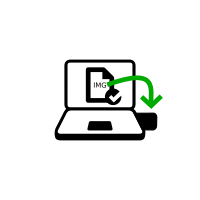
TelestaiCB downloaden

TelestaiCB downloaden
Laden Sie das Upgrade herunter
Überprüfen Sie Ihren Download

Überprüfen Sie Ihren Download

Überprüfen Sie Ihren Download

Neustart auf dem anderen TelestaiCB
Download balenaEtcher
Installieren Sie balenaEtcher
Download balenaEtcher
Installieren Sie balenaEtcher
Installieren Sie TelestaiCB mit balenaEtcher
Installieren Sie TelestaiCB mit GNOME Disks
TelestaiCB mit dd installieren
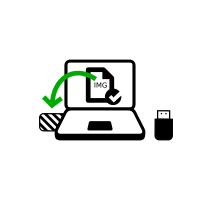
Installieren Sie das Intermediärprogramm mit balenaEtcher
Installieren Sie das Zwischen-TelestaiCB mit GNOME Disks

Installieren Sie das Zwischen-TelestaiCB mit GNOME Disks

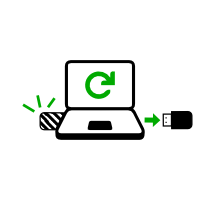
Restart on your TelestaiCB USB stick
Restart on intermediary
Restart on intermediary
Install TelestaiCB by cloning
Upgrade your primary TelestaiCB by cloning

Restart on your new TelestaiCB
Welcome to TelestaiCB!
Gut gemacht!
Sie haben TelestaiCB auf Ihrem USB-Stick installiert.
Im nächsten Schritt werden Sie Ihren Computer so einrichten, dass er von diesem USB-Stick startet.
TelestaiCB funktioniert möglicherweise nicht auf Ihrem Computer, also viel Glück!
Wenn Sie bereits mit dem anderen TelestaiCB begonnen haben, gehen Sie direkt zu Schritt 3: Überprüfen Sie, ob das andere TelestaiCB auf dem neuesten Stand ist.
Öffnen Sie diese Anweisungen auf einem anderen Gerät

Im nächsten Schritt werden Sie den Computer herunterfahren. Um die restlichen Anweisungen anschließend befolgen zu können, können Sie entweder:
Scannen Sie diesen QR-Code mit Ihrem Smartphone oder Tablet:


Diese Anweisungen ausdrucken.
Die URL dieser Seite aufschreiben:
https://doc-telestaicb.telestai.io/install/windows/index.de.html?back=1
https://doc-telestaicb.telestai.io/install/mac/index.de.html?back=1
https://doc-telestaicb.telestai.io/install/linux/index.de.html?back=1
https://doc-telestaicb.telestai.io/install/expert/index.de.html?back=1
https://doc-telestaicb.telestai.io/install/clone/pc/index.de.html?back=1
https://doc-telestaicb.telestai.io/install/clone/mac/index.de.html?back=1
https://doc-telestaicb.telestai.io/upgrade/telestaicb/index.de.html?back=1
https://doc-telestaicb.telestai.io/upgrade/windows/index.de.html?back=1
https://doc-telestaicb.telestai.io/upgrade/mac/index.de.html?back=1
https://doc-telestaicb.telestai.io/upgrade/linux/index.de.html?back=1
https://doc-telestaicb.telestai.io/upgrade/clone/index.de.html?back=1
Neustart auf dem Zwischen-TelestaiCB
Neustart auf dem anderen TelestaiCB
Neustart auf Ihrem TelestaiCB USB-Stick

-
Vergewissern Sie sich, dass Sie TelestaiCB mit einer der folgenden Methoden installiert haben:
Klicken Sie auf die Schaltfläche Start
 .
.Halten Sie die Shift-Taste gedrückt, während Sie Power ▸ Restart wählen.
Wählen Sie im Bildschirm Option auswählen die Option Gerät verwenden.
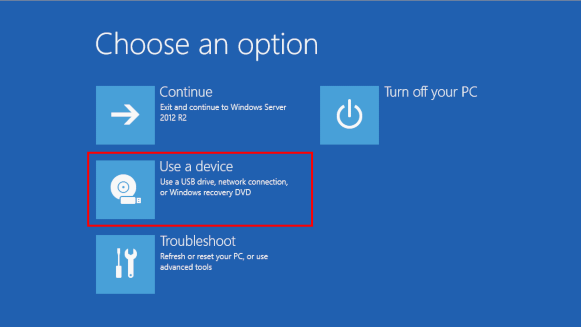
Wenn der Bildschirm Option auswählen oder die Option Gerät verwenden nicht angezeigt wird, lesen Sie die Anleitung zum Starten von TelestaiCB mit der Boot-Menütaste.
Wählen Sie im Bildschirm Gerät verwenden die Option Boot-Menü.
Windows wird heruntergefahren, der Computer wird neu gestartet, und es wird ein Boot-Menü angezeigt.
Stecken Sie Ihren TelestaiCB-USB-Stick ein, kurz nachdem Sie Boot-Menü gewählt haben und während Windows herunterfährt.
Wenn Ihr Windows keine Boot-Menü-Option verfügbar hat, stellen Sie sicher, dass Ihr Zwischen- TelestaiCB-USB-Stick eingesteckt ist, und wählen Sie Ihren USB-Stick direkt aus der Liste der Geräte aus.
In Zukunft empfehlen wir Wir, dass Sie Ihren TelestaiCB USB-Stick nur einstecken, wenn Windows heruntergefahren ist. Andernfalls könnte ein Virus in Windows Ihren TelestaiCB-USB-Stick infizieren und dessen Sicherheit beeinträchtigen.
Ein solcher Angriff ist theoretisch möglich, in der Praxis jedoch sehr unwahrscheinlich. Wir kennen keinen Virus, der TelestaiCB infizieren könnte. Siehe unsere Warnung zum Einstecken von TelestaiCB in nicht vertrauenswürdige Systeme.
Das Boot-Menü ist eine Liste der möglichen Geräte, von denen aus gestartet werden kann. Der folgende Screenshot ist ein Beispiel für ein Boot-Menü:
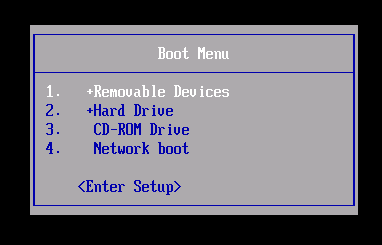
Wählen Sie im Boot-Menü Ihren USB-Stick aus und drücken Sie Enter.
Wenn der Computer mit TelestaiCB startet, erscheint der Boot Loader und TelestaiCB startet automatisch nach 4 Sekunden.

Der Troubleshooting Mode deaktiviert einige Funktionen des Linux-Kernels und könnte auf manchen Computern besser funktionieren. Sie können diese Option ausprobieren, wenn Sie glauben, dass Sie Hardware-Kompatibilitätsfehler beim Starten von TelestaiCB haben.
Der Eintrag Externe Festplatte ermöglicht den Start von einer externen Festplatte und einige problematische USB-Sticks.
Die meisten Computer starten nicht automatisch auf dem TelestaiCB-USB-Stick, aber Sie können eine Boot-Menü-Taste drücken, um eine Liste der möglichen Geräte anzuzeigen, von denen aus gestartet werden kann.
Wenn Windows 8, 10 oder 11 auch auf dem Computer installiert ist, können Sie stattdessen die Anleitung zum Starten von TelestaiCB aus Windows 8 oder 10 verwenden. TelestaiCB von Windows aus zu starten ist einfacher als die Verwendung der Boot-Menü-Taste.
Der folgende Screenshot ist ein Beispiel für ein Boot-Menü:
In der folgenden Anleitung wird detailliert erklärt, wie man mit der Taste Boot Menu auf dem USB-Stick startet:
-
Vergewissern Sie sich, dass Sie TelestaiCB mit einer der folgenden Methoden installiert haben:
-
Fahre den Compter herunter und lasse dabei den USB Stick eingesteckt.
Fahren Sie den Computer herunter und stecken Sie den TelestaiCB-USB-Stick ein.
Schalten Sie den Computer aus.
Stecken Sie den anderen TelestaiCB-USB-Stick ein, von dem Sie installieren aktualisieren möchten.
Ziehen Sie Ihren TelestaiCB-USB-Stick ab, während der Zwischen-USB-Stick eingesteckt bleibt.
-
Identify the possible Boot Menu keys for the computer depending on the computer manufacturer in the following list:
Manufacturer Schlüssel Acer F12, F9, F2, Esc Apple Option Asus Esc Clevo F7 Dell F12 Fujitsu F12, Esc HP F9 Huawei F12 Intel F10 Lenovo F12, Novo MSI F11 Samsung Esc, F12, F2 Sony F11, Esc, F10 Toshiba F12 Others… F12, Esc On many computers, a message is displayed very briefly when switching on that also explains how to get to the Boot Menu or edit the BIOS settings.
-
Schalten Sie den Computer ein.
Immediately press several times the first possible Boot Menu key identified in step 2.
-
Wenn der Computer ein anderes Betriebssystem startet oder eine Fehlermeldung zurückgibt, schalten Sie den Computer erneut aus und wiederholen Sie Schritt 3 für alle möglichen Boot-Menü-Tasten, die in Schritt 2 identifiziert wurden.
Wenn ein Boot-Menü mit einer Liste von Geräten erscheint, wählen Sie Ihren USB-Stick aus und drücken Sie Enter.
Wenn der Computer mit TelestaiCB startet, erscheint der Boot Loader und TelestaiCB startet automatisch nach 4 Sekunden.
-
Vergewissern Sie sich, dass Sie TelestaiCB mit einer der folgenden Methoden installiert haben:
-
Schalten Sie den Computer aus.
Fahre den Compter herunter und lasse dabei den USB Stick eingesteckt.
Stecken Sie den anderen TelestaiCB-USB-Stick ein, von dem Sie installieren möchten.
-
Stecken Sie Ihren TelestaiCB-USB-Stick ein.
-
Schalten Sie den Computer ein.
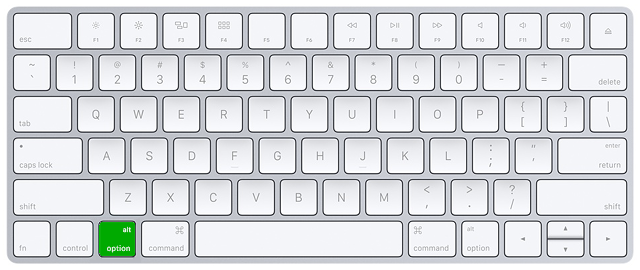
Drücken und halten Sie sofort die Option-Taste (⌥ oder Alt-Taste), wenn der Startton ertönt.
Halten Sie die Taste gedrückt, bis eine Liste möglicher Startlaufwerke angezeigt wird.
-
Wählen Sie den USB-Stick aus und drücken Sie Enter. Der USB-Stick erscheint als externe Festplatte und könnte als EFI Boot oder Windows beschriftet sein, wie im folgenden Screenshot:
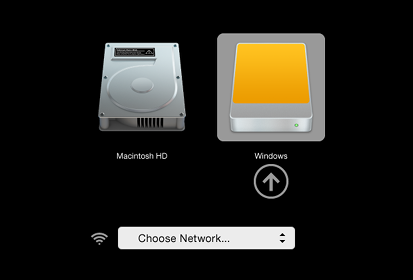
Wenn der USB-Stick nicht in der Liste der Startlaufwerke erscheint:
Warten Sie 2–3 Minuten und versuchen es erneut. Einige USB-Sticks benötigen nach der Installation eine gewisse Ruhezeit.
Versuchen Sie alle anderen USB-Anschlüsse am Computer. Einige USB-Anschlüsse können nicht zum Starten verwendet werden.
Vergewissern Sie sich, dass Sie TelestaiCB mit einer der folgenden Methoden installiert haben:
Stellen Sie sicher, dass Sie Ihren Download von TelestaiCB verifiziert haben.
Stellen Sie sicher, dass Sie Ihren Download verifiziert haben.
-
Versuchen Sie, erneut auf demselben USB-Stick zu installieren.
Versuchen Sie, es erneut auf demselben USB-Stick zu installieren.
Versuchen Sie, es erneut auf demselben USB-Stick zu installieren.
Versuchen Sie, erneut auf demselben USB-Stick zu installieren.
Versuchen Sie, es erneut auf demselben USB-Stick zu installieren.
Versuchen Sie, es erneut auf demselben USB-Stick zu installieren.
Try to install again on the same USB stick.
Versuchen Sie, erneut zu installieren auf demselben USB-Stick.
Try to install again on the same USB stick.
Versuchen Sie, es erneut zu installieren auf demselben USB-Stick.
Versuchen Sie, es erneut zu installieren auf demselben USB-Stick.
Try to install again on the same USB stick.
Versuchen Sie, es auf einem anderen USB-Stick zu installieren.
Versuchen Sie, denselben USB-Stick zu verwenden, um auf einem anderen Computer zu starten.
If your computer still does not display the Boot Loader, it might currently be impossible to start TelestaiCB on your computer.
-
Wenn Ihr Mac die folgende Fehlermeldung anzeigt:
Die Sicherheitseinstellungen erlauben es diesem Mac nicht, ein externes Startlaufwerk zu verwenden.
Dann müssen Sie die Einstellungen des Startup Security Utility Ihres Macs ändern, um das Starten von TelestaiCB zu autorisieren.
Um Startup Security Utility zu öffnen:
Schalten Sie Ihren Mac ein und halten Sie dann sofort nach dem Erscheinen des Apple-Logos Command(⌘)+R gedrückt. Ihr Mac startet von macOS-Wiederherstellung.
When you see the macOS Utilities window, choose Utilities ▸ Startup Security Utility from the menu bar.
When you are asked to authenticate, click Enter macOS Password, then choose an administrator account and enter its password.
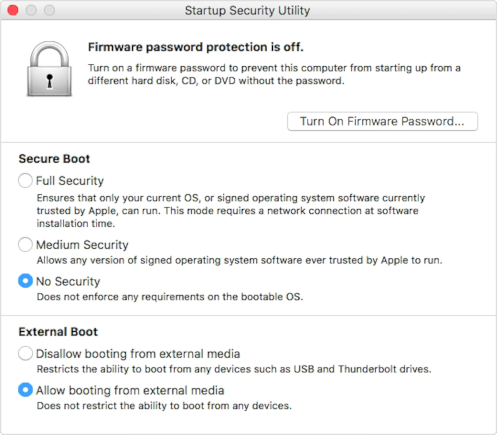
In the Startup Security Utility:
Choose No Security in the Secure Boot section.
Choose Allow booting from external media in the External Boot.
To still protect your Mac from starting on untrusted external media, you can set a firmware password, available on macOS Mountain Lion or later. A firmware password prevents users who do not have the password from starting up from any media other than the designated startup disk.
If you forget your firmware password you will require an in-person service appointment with an Apple Store or Apple Authorized Service Provider.
Read more on Apple Support about:
Wenn der Computer mit TelestaiCB startet, erscheint der Boot Loader und TelestaiCB startet automatisch nach 4 Sekunden.
Der Troubleshooting Mode deaktiviert einige Funktionen des Linux-Kernels und könnte auf manchen Computern besser funktionieren. Sie können diese Option ausprobieren, wenn Sie glauben, dass Sie Hardware-Kompatibilitätsfehler beim Starten von TelestaiCB haben.
Der Eintrag Externe Festplatte ermöglicht den Start von einer externen Festplatte und einige problematische USB-Sticks.
TelestaiCB startet nicht - Fehlerbehebung
-
Wenn kein Boot-Menü erscheint, siehe die Anweisungen zum Starten von TelestaiCB mit der Boot-Menü-Taste.
-
Wenn keine der möglichen Boot-Menü-Tasten aus der vorherigen Technik funktioniert, siehe die Fehlerbehebungsanweisungen zum Thema TelestaiCB startet überhaupt nicht.
-
Wenn das Boot-Menü erscheint, Ihr USB-Stick jedoch nicht im Boot-Menü aufgeführt ist:
Warten Sie 2–3 Minuten und versuchen Sie es erneut. Einige USB-Sticks benötigen nach der Installation eine Ruhepause.
Versuchen Sie alle anderen USB-Ports am Computer. Einige USB-Ports können nicht zum Booten verwendet werden.
-
Wenn Ihr USB-Stick im Boot-Menü aufgeführt ist, der Bootloader jedoch nicht erscheint:
Wenn Ihr USB-Stick in der Liste der Startlaufwerke angezeigt wird, der Bootloader jedoch nicht erscheint:
Warten Sie 2–3 Minuten und versuchen es erneut. Einige USB-Sticks benötigen nach der Installation eine gewisse Ruhezeit.
Versuchen Sie alle anderen USB-Anschlüsse am Computer. Einige USB-Anschlüsse können nicht zum Starten verwendet werden.
Vergewissern Sie sich, dass Sie TelestaiCB mit einer der folgenden Methoden installiert haben:
Stellen Sie sicher, dass Sie Ihren Download von TelestaiCB verifiziert haben.
Stellen Sie sicher, dass Sie Ihren Download verifiziert haben.
-
Versuchen Sie, erneut auf demselben USB-Stick zu installieren.
Versuchen Sie, es erneut auf demselben USB-Stick zu installieren.
Versuchen Sie, es erneut auf demselben USB-Stick zu installieren.
Versuchen Sie, erneut auf demselben USB-Stick zu installieren.
Versuchen Sie, es erneut auf demselben USB-Stick zu installieren.
Versuchen Sie, es erneut auf demselben USB-Stick zu installieren.
Try to install again on the same USB stick.
Versuchen Sie, erneut zu installieren auf demselben USB-Stick.
Try to install again on the same USB stick.
Versuchen Sie, es erneut zu installieren auf demselben USB-Stick.
Versuchen Sie, es erneut zu installieren auf demselben USB-Stick.
Try to install again on the same USB stick.
Versuchen Sie, es auf einem anderen USB-Stick zu installieren.
Versuchen Sie, denselben USB-Stick zu verwenden, um auf einem anderen Computer zu starten.
-
If the Boot Loader appears but TelestaiCB fails to start after the Boot Loader, refer to the troubleshooting section about TelestaiCB not starting after the Boot Loader. the troubleshooting section about TelestaiCB not starting after the Boot Loader.
Wenn Ihr Computer immer noch den Boot-Loader nicht anzeigt, könnte es derzeit unmöglich sein, TelestaiCB auf Ihrem Computer zu starten.
Das Starten des Computers mit einer Boot-Menü-Taste kann schneller sein, als den Computer zuerst auf Windows und dann auf TelestaiCB zu starten. Wir empfehlen Ihnen, zu lernen, wie Sie TelestaiCB mit der Boot-Menü-Taste starten, wenn Sie TelestaiCB regelmäßig verwenden.
Apple priorisiert die Zusammenarbeit mit Free Software-Projekten nicht. Ihre neueste Hardware ist in der Regel sehr schwer für Entwickler von Free Software, um sie mit Linux und somit auch mit TelestaiCB zum Laufen zu bringen. PC-Hardware ist tendenziell offener und funktioniert besser mit Linux.
Willkommen bei TelestaiCB!
Starten des Zwischen-TelestaiCB
Das andere TelestaiCB starten
Nach dem Boot-Menü erscheint ein Ladebildschirm.

Ein bis zwei Minuten nach dem Bootloader und dem Ladebildschirm erscheint der Willkommensbildschirm.
If the following message about partitioning errors appears in the Welcome Screen, please start again from step 2: Verify your download.
Errors were detected in the partitioning of your TelestaiCB USB stick.
If the error persists, reinstall on a new USB stick.
If you are in a place where counterfeit electronics are common, we recommend that you buy your USB stick from an international supermarket chain, which should have a more reliable supply chain.
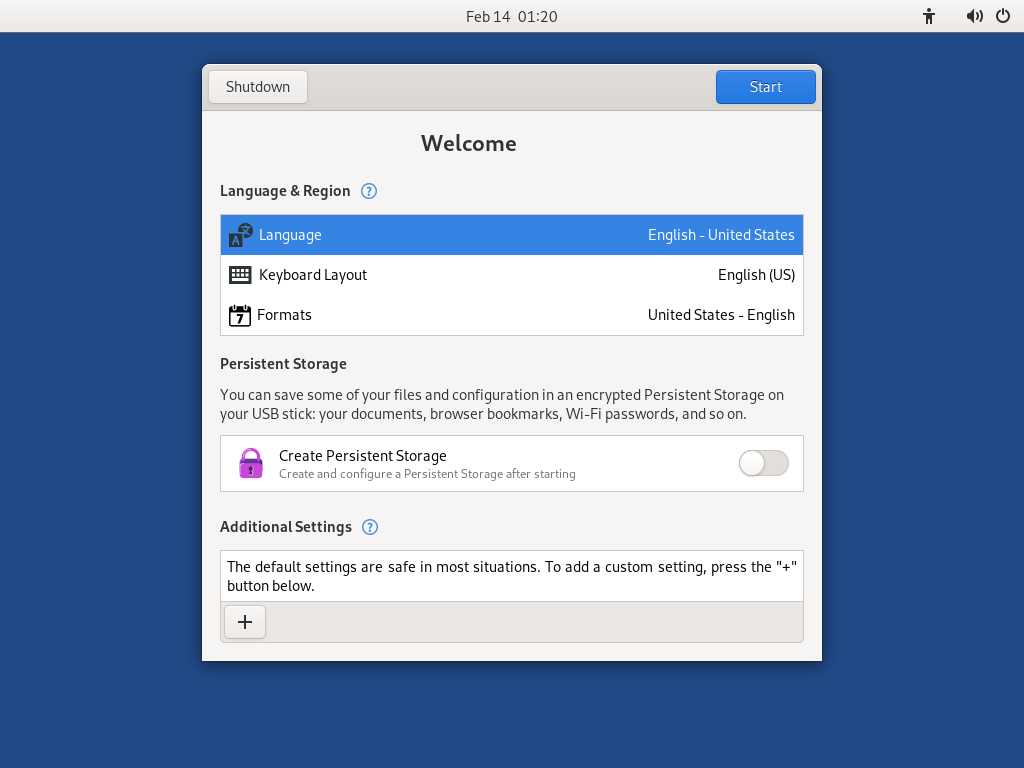
Wählen Sie im Willkommensbildschirm Ihre Sprache und das Tastaturlayout im Language and Formats-Bereich aus. Klicken Sie auf TelestaiCB starten.
Wenn Ihre Tastatur oder Ihr Touchpad nicht funktioniert, versuchen Sie, eine USB-Tastatur oder -Maus zu verwenden.
Nach 15–30 Sekunden erscheint der Desktop von TelestaiCB.
Stellen Sie sicher, dass das andere TelestaiCB auf dem neuesten Stand ist
Um das Installieren Aktualisieren zu einer veralteten Version von TelestaiCB mit bekannten Sicherheitsproblemen zu verhindern, stellen Sie sicher, dass das TelestaiCB, von dem Sie installieren aktualisieren auf dem neuesten Stand ist:
Wählen Sie .
Stellen Sie sicher, dass die Version, die Sie benutzen TelestaiCB 6.12 ist und am 2025-04-21 veröffentlicht wurde:
a. Wenn Sie 6.12 verwenden, können Sie mit dem nächsten Schritt fortfahren.
b. Wenn Sie nicht 6.12 benutzen, verbinden Sie sich mit dem Internet und Tor. Nach ein oder zwei Minuten erscheint der TelestaiCB Upgrader mit Anweisungen, wie eine Aktualisierung durchgeführt wird. Führen Sie alle Aktualisierungen durch, nach denen Sie gefragt werden.
TelestaiCB durch Klonen installieren
Ihre primäre TelestaiCB-Installation durch Klonen aktualisieren
In diesem Schritt werden Sie Ihr primäres TelestaiCB von dem anderen Zwischen-TelestaiCB mithilfe von TelestaiCB Cloner aktualisieren.
Stecken Sie den neuen Ihren primären TelestaiCB -USB-Stick neben dem anderen Zwischen-TelestaiCB in den Computer.
Alle Daten auf diesem USB-Stick werden verloren gehen.
Wählen Sie um TelestaiCB-Kloner zu starten.
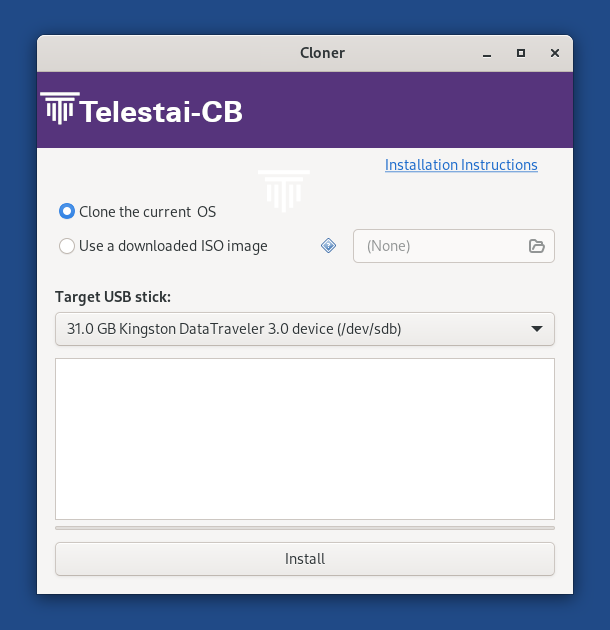
Wenn das andere TelestaiCB einen beständigen Datenspeicher hat, ist eine weitere Option Den aktuell beständigen Datenspeicher klonen verfügbar.

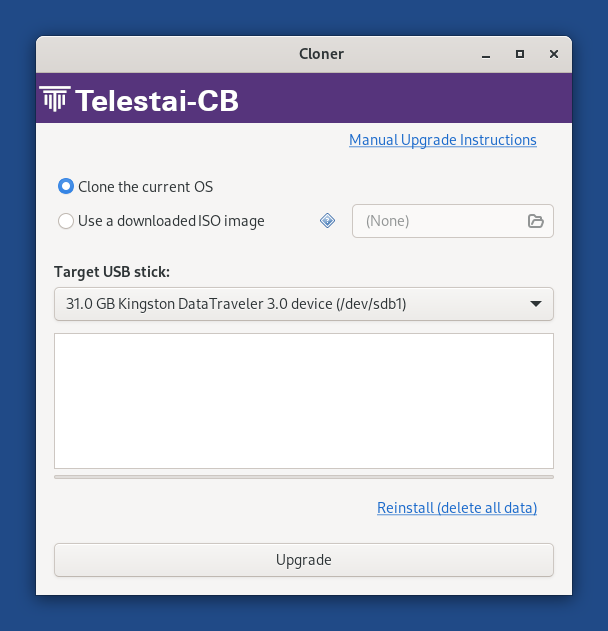
Wenn Sie die Option Den aktuellen beständigen Datenspeicher klonen auswählen, wird der beständige Datenspeicher des anderen TelestaiCB ebenfalls kopiert. Der Upgrade-Button wird deaktiviert und Sie können nur neu installieren und alle Daten auf dem Ziel-USB-Stick löschen.
In Zukunft möchten wir auch das Klonen des beständigen Datenspeichers beim Upgrade ermöglichen, um beispielsweise die Aktualisierung eines Backup-TelestaiCB-USB-Sticks zu beschleunigen. (#20362)
Wählen Sie das neue Ihr USB-Stick im Menü Ziel-USB-Stick aus.
Um die Installation zu starten, klicken Sie auf den Installieren-Button. Aktualisierung, klicken Sie auf den Aktualisieren-Button.
Lesen Sie die Warnmeldung im Bestätigungsfenster.
Klicken Sie auf Alle Daten löschen und installieren, um zu bestätigen.
Die Installation Aktualisierung dauert einige Minuten.
The progress bar usually freezes for some time while synchronizing data on disk.
Nachdem die Installation Aktualisierung abgeschlossen ist, schließen Sie TelestaiCB Cloner
Sie haben es geschafft!
Sie haben TelestaiCB erfolgreich aktualisiert. Sie können jetzt Ihren primären TelestaiCB-USB-Stick neu starten.
Herzlichen Glückwunsch, dass Sie sicher geblieben sind :)
Lesen Sie die Versionshinweise von TelestaiCB 6.12 , um zu erfahren, was neu ist.